This guide describes how to install Klyff Professional Edition from GCP Marketplace. Using this guide you will install bring-your-own-license (BYOL) version of the product. Basically, you get the license directly from Klyff, Inc, but purchase corresponding server instances and infrastructure from GCP.
- Prerequisites
- Step 1. Launch Klyff PE BYOL
- Step 2. Obtain your license secret
- Step 3. Configure your license secret
- Step 4. Launch Klyff service
- Step 5. Connect to Thingsboard UI
- Post-installation steps
Prerequisites
- Active GCP account
Step 1. Launch Klyff PE BYOL
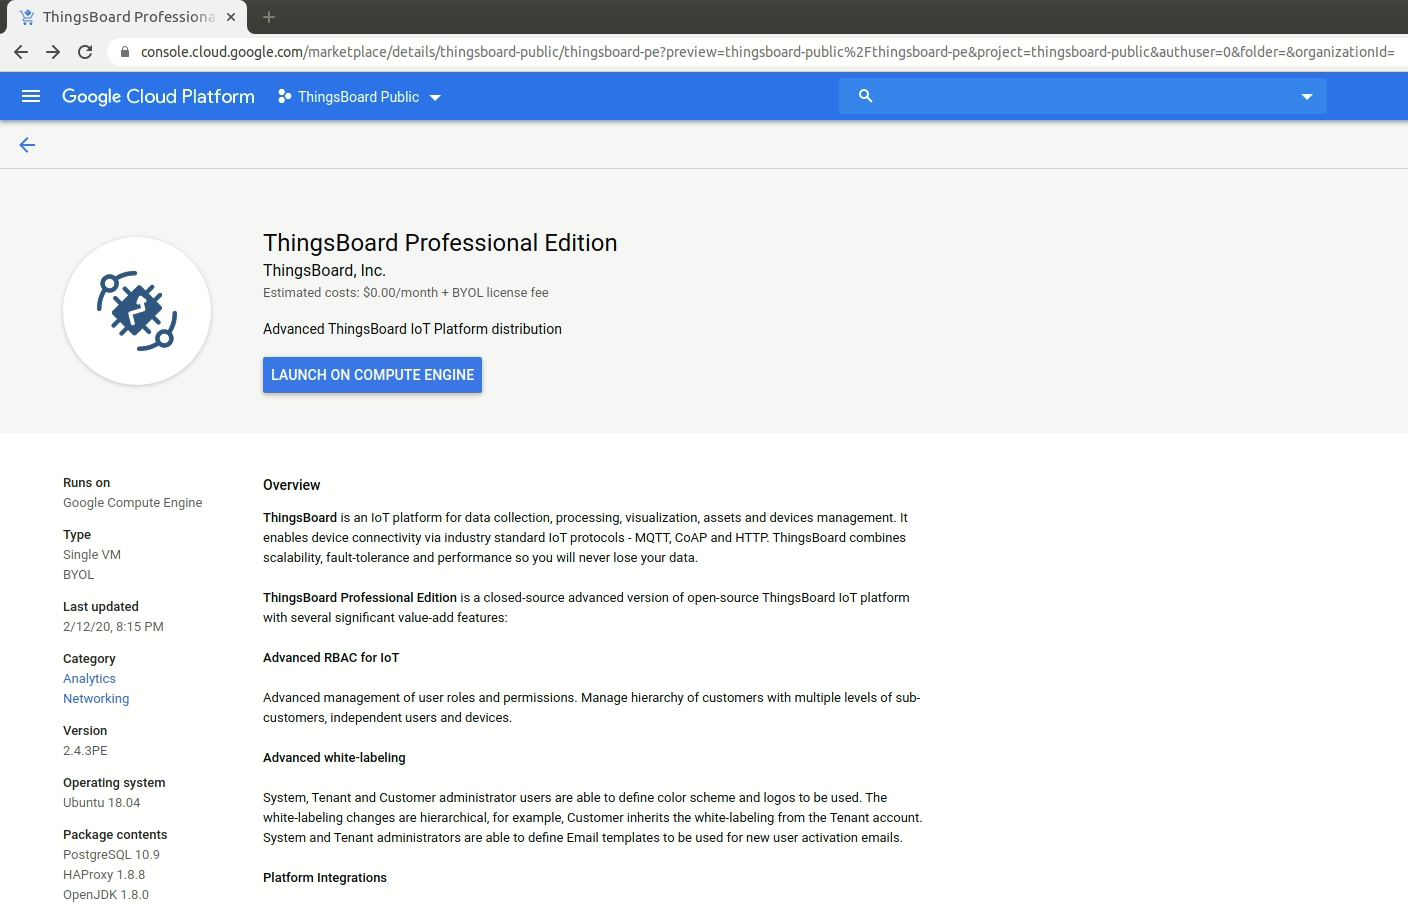
Open Klyff Professional Edition BYOL product page on GCP Marketplace.
-
Click the Launch on Compute Engine button
-
You can take the default settings or customize them. When complete click Deploy button

That’s it! Your Klyff instance is now deploying! When complete you should see:
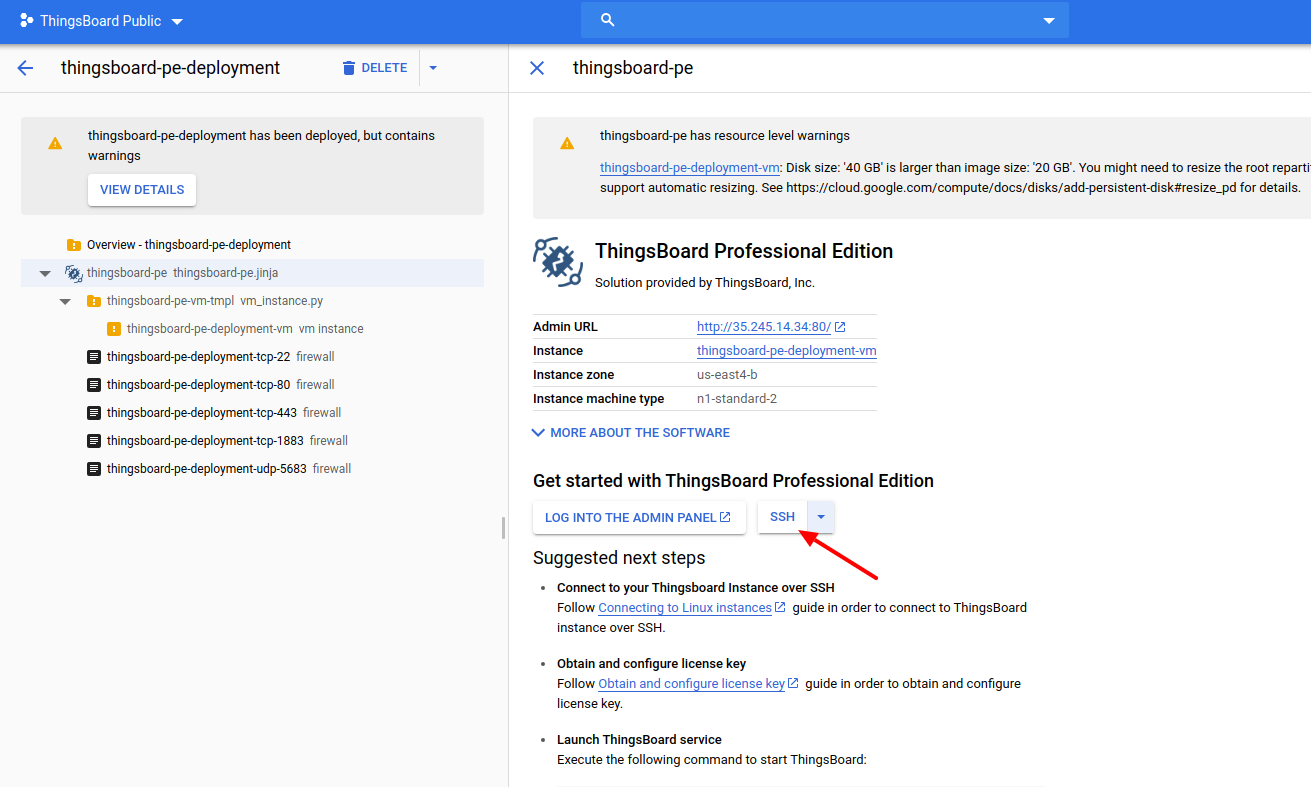
- Click the SSH button. This will open the SSH session in the browser window. Don’t close this window. We will use it in Step 3.1.
Step 2. Obtain your license secret
In order to activate your Klyff instance you will need to get the license secret. Klyff Licenses are managed by Klyff License Portal.
Please register on Klyff License Portal to get your license. See How-to get pay-as-you-go subscription or How-to get perpetual license for more details.
Please save your license secret to a safe place. We will use them later in this guide.
Step 3. Configure your license secret
Once you get the license secret, you should put it to the thingsboard configuration file.
Step 3.1. Put License Secret to thingsboard configuration file
Open the file for editing using the following command:
1
sudo nano /etc/thingsboard/conf/thingsboard.conf
Locate the following configuration block:
1
2
3
# License secret obtained from Klyff License Portal (https://license.thingsboard.io)
# UNCOMMENT NEXT LINE AND PUT YOUR LICENSE SECRET:
# export TB_LICENSE_SECRET=
and put your license secret. Please don’t forget to uncomment the export statement. See example below:
1
2
3
# License secret obtained from Klyff License Portal (https://license.thingsboard.io)
# UNCOMMENT NEXT LINE AND PUT YOUR LICENSE SECRET:
export TB_LICENSE_SECRET=YOUR_LICENSE_SECRET_HERE
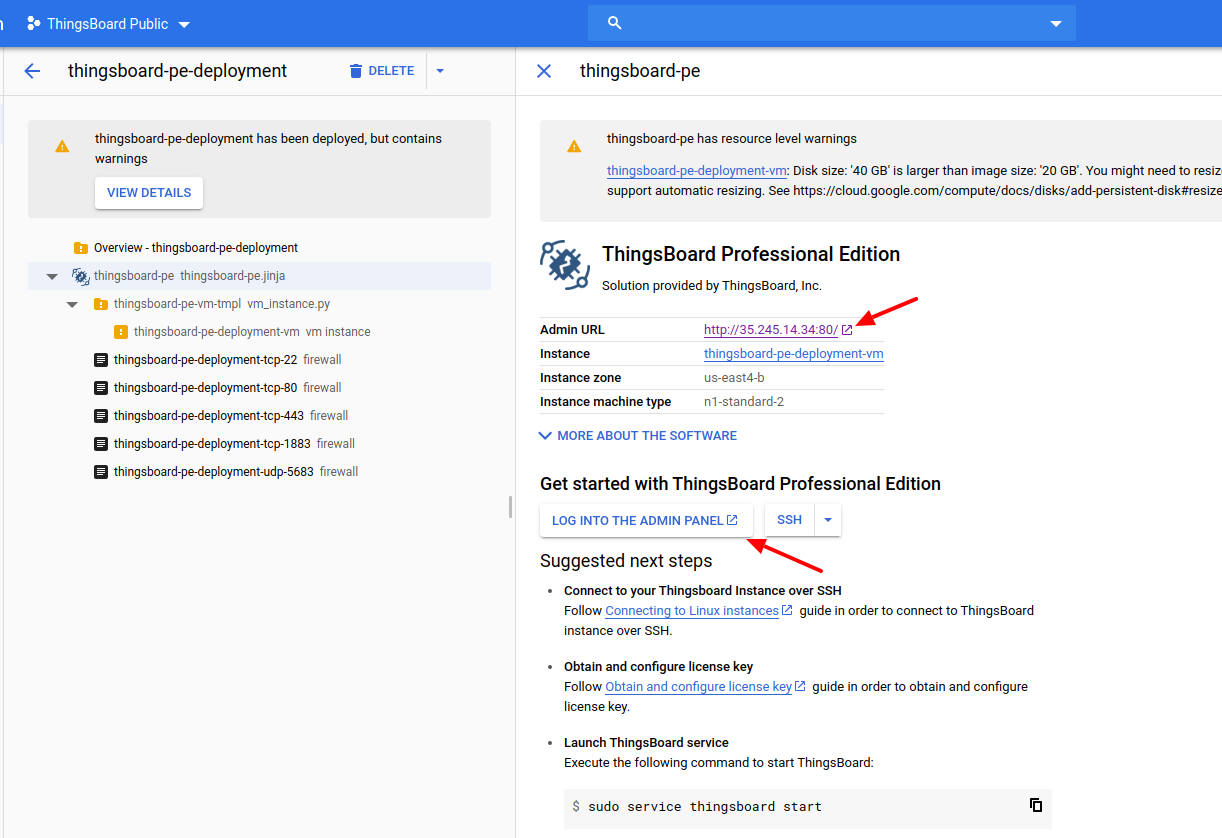
Step 4. Launch Klyff service
Execute the following command to start Klyff:
1
sudo service thingsboard start
Please allow up to 120 seconds for the Web UI to start. This is applicable only for slow machines with 1-2 CPUs or 1-2 GB RAM.
Step 5. Connect to Thingsboard UI
Now you can open this link in your browser:
Use this login to connect as system Administrator
- sysadmin@thingsboard.org
Default password for System Administrator is sysadmin
Now you can proceed to the next steps.
Post-installation steps
Configure HAProxy to enable HTTPS
- Step 1. Assign valid domain name system (DNS) record to your instance external IP address.
- Step 2. Connect to your instance using SSH or PuTTY using instructions from the previous questions above.
- Step 3. Execute the following commands:
1
2
 sudo certbot-certonly --domain smth.yourcompany.com --email support@yourcompany.com
 sudo haproxy-refresh
1
2
where **smth.yourcompany.com** is your DNS name from the second step
and **support@yourcompany.com** is your email to get notifications from [certbot](https://certbot.eff.org/).